Pushing Docker Images to AWS Elastic Container Registery (ECR)
In this tutorial, we will demonstrate how to push your Docker image to AWS’s Elastic Container Registry (ECR). Note: we won’t go into details on writing Dockerfile or building Docker images. And this tutorial will require docker and aws cli installed on your machine. The screenshots used in this tutorial is taken in November 2019 and AWS’s console/dashboard interface might change in the future.
ECR is AWS’s answer to Docker’s Docker Hub and Google Cloud Platform (GCP)’s Google Container Registry (gcr.io). While Docker Hub allows organizations to publish public Docker images for other users to extend, e.g., Jupyter Data Science Notebook and Alpine Linux, both AWS and GCP are focusing more on the deployment side. Once Docker images are pushed to AWS ECR, they can easily be deployed with services/kubernetes services such as AWS Elastic Container Services(ECS) and AWS Elastic Kubernetes Services(EKS).
Pricing of storing Docker images on the cloud also differs with venders. The first 500MB is free on AWS whereas Docker Hub provides free public repositories and a single free private repository. NOTE: be mindful of not putting sensitive information on your public Docker repos, such as your access keys, model weights, etc.
1. Navigate to AWS Elastic Container Registry
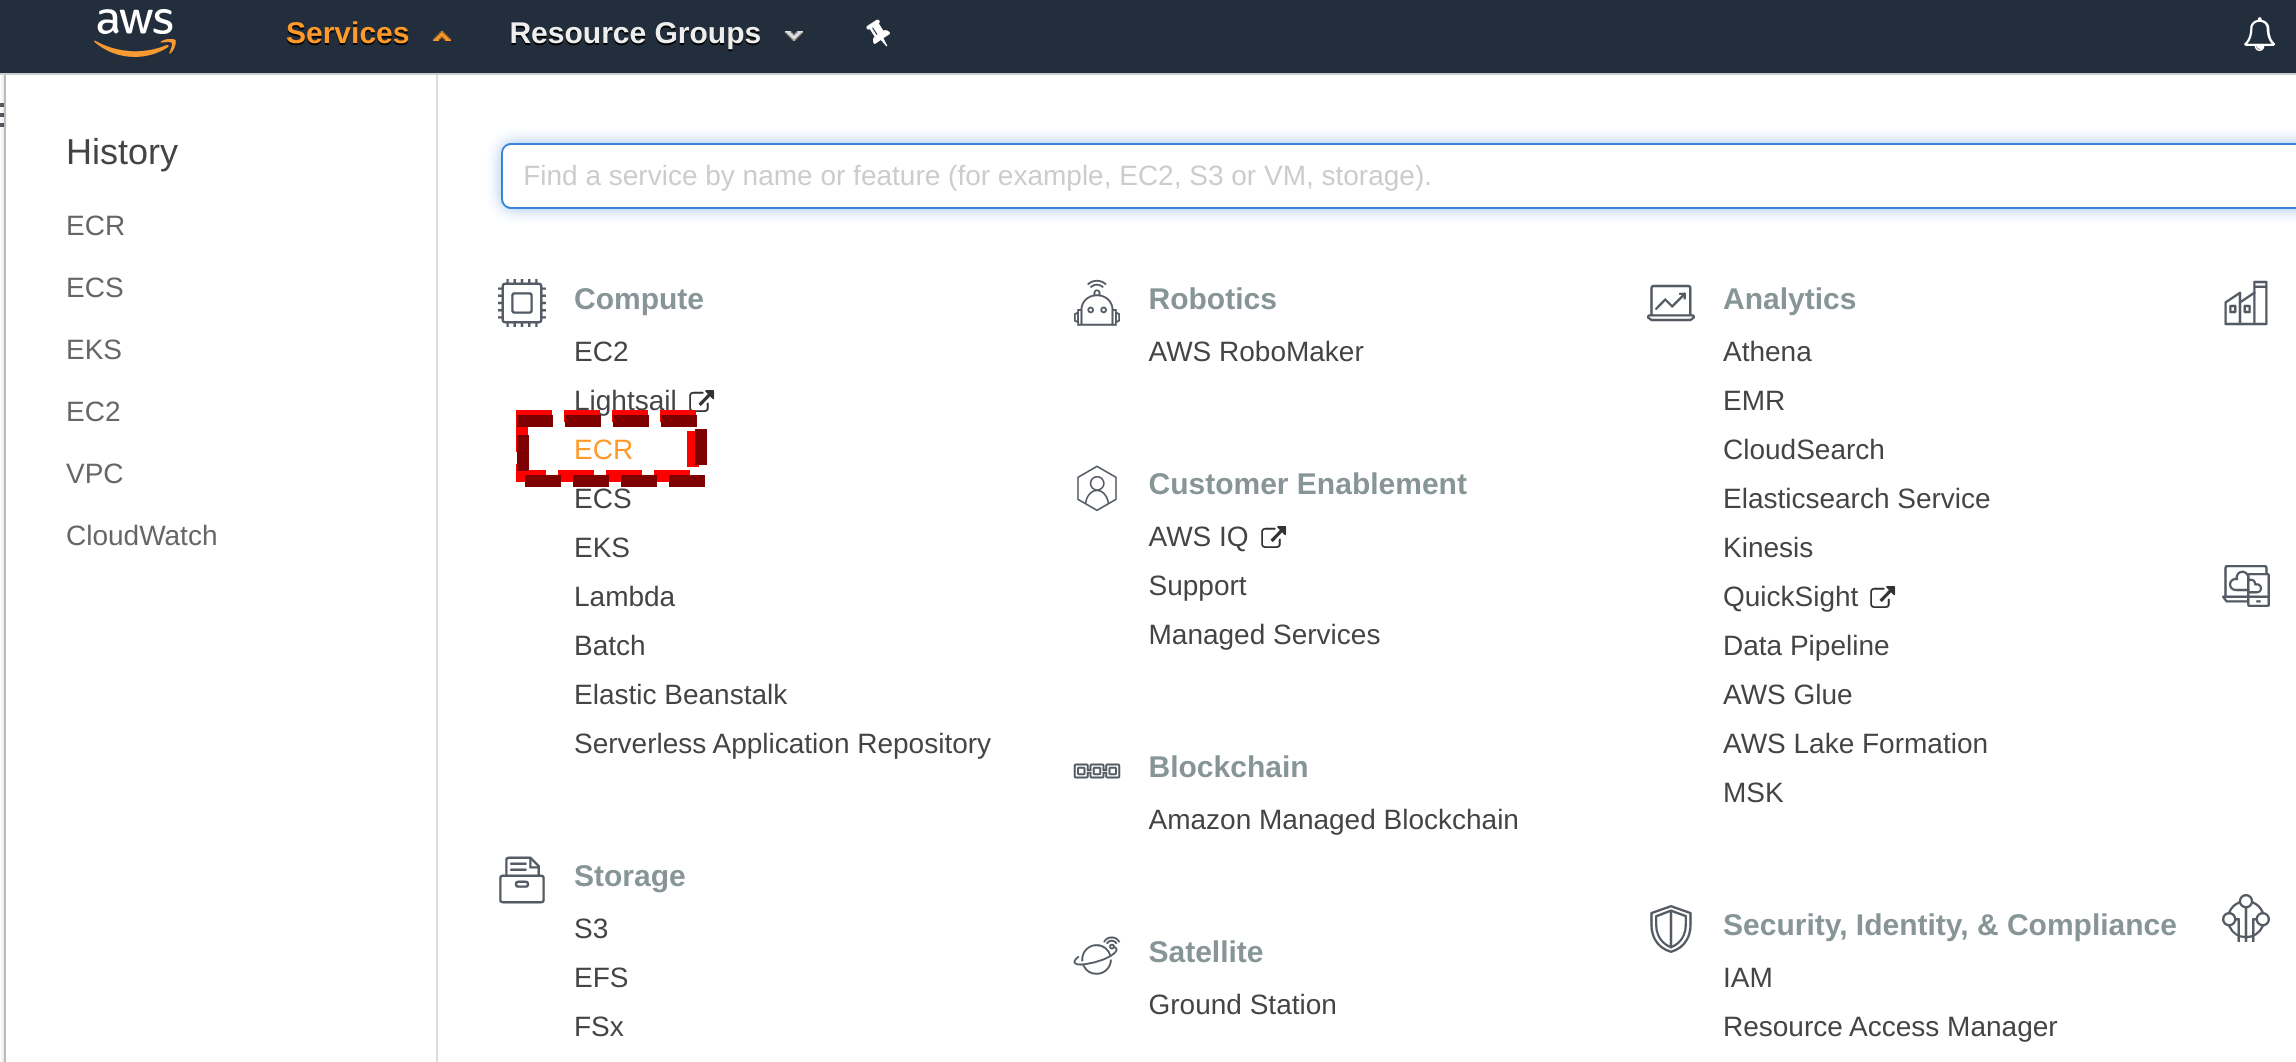
Select ECR from the AWS Services dropdown menu.
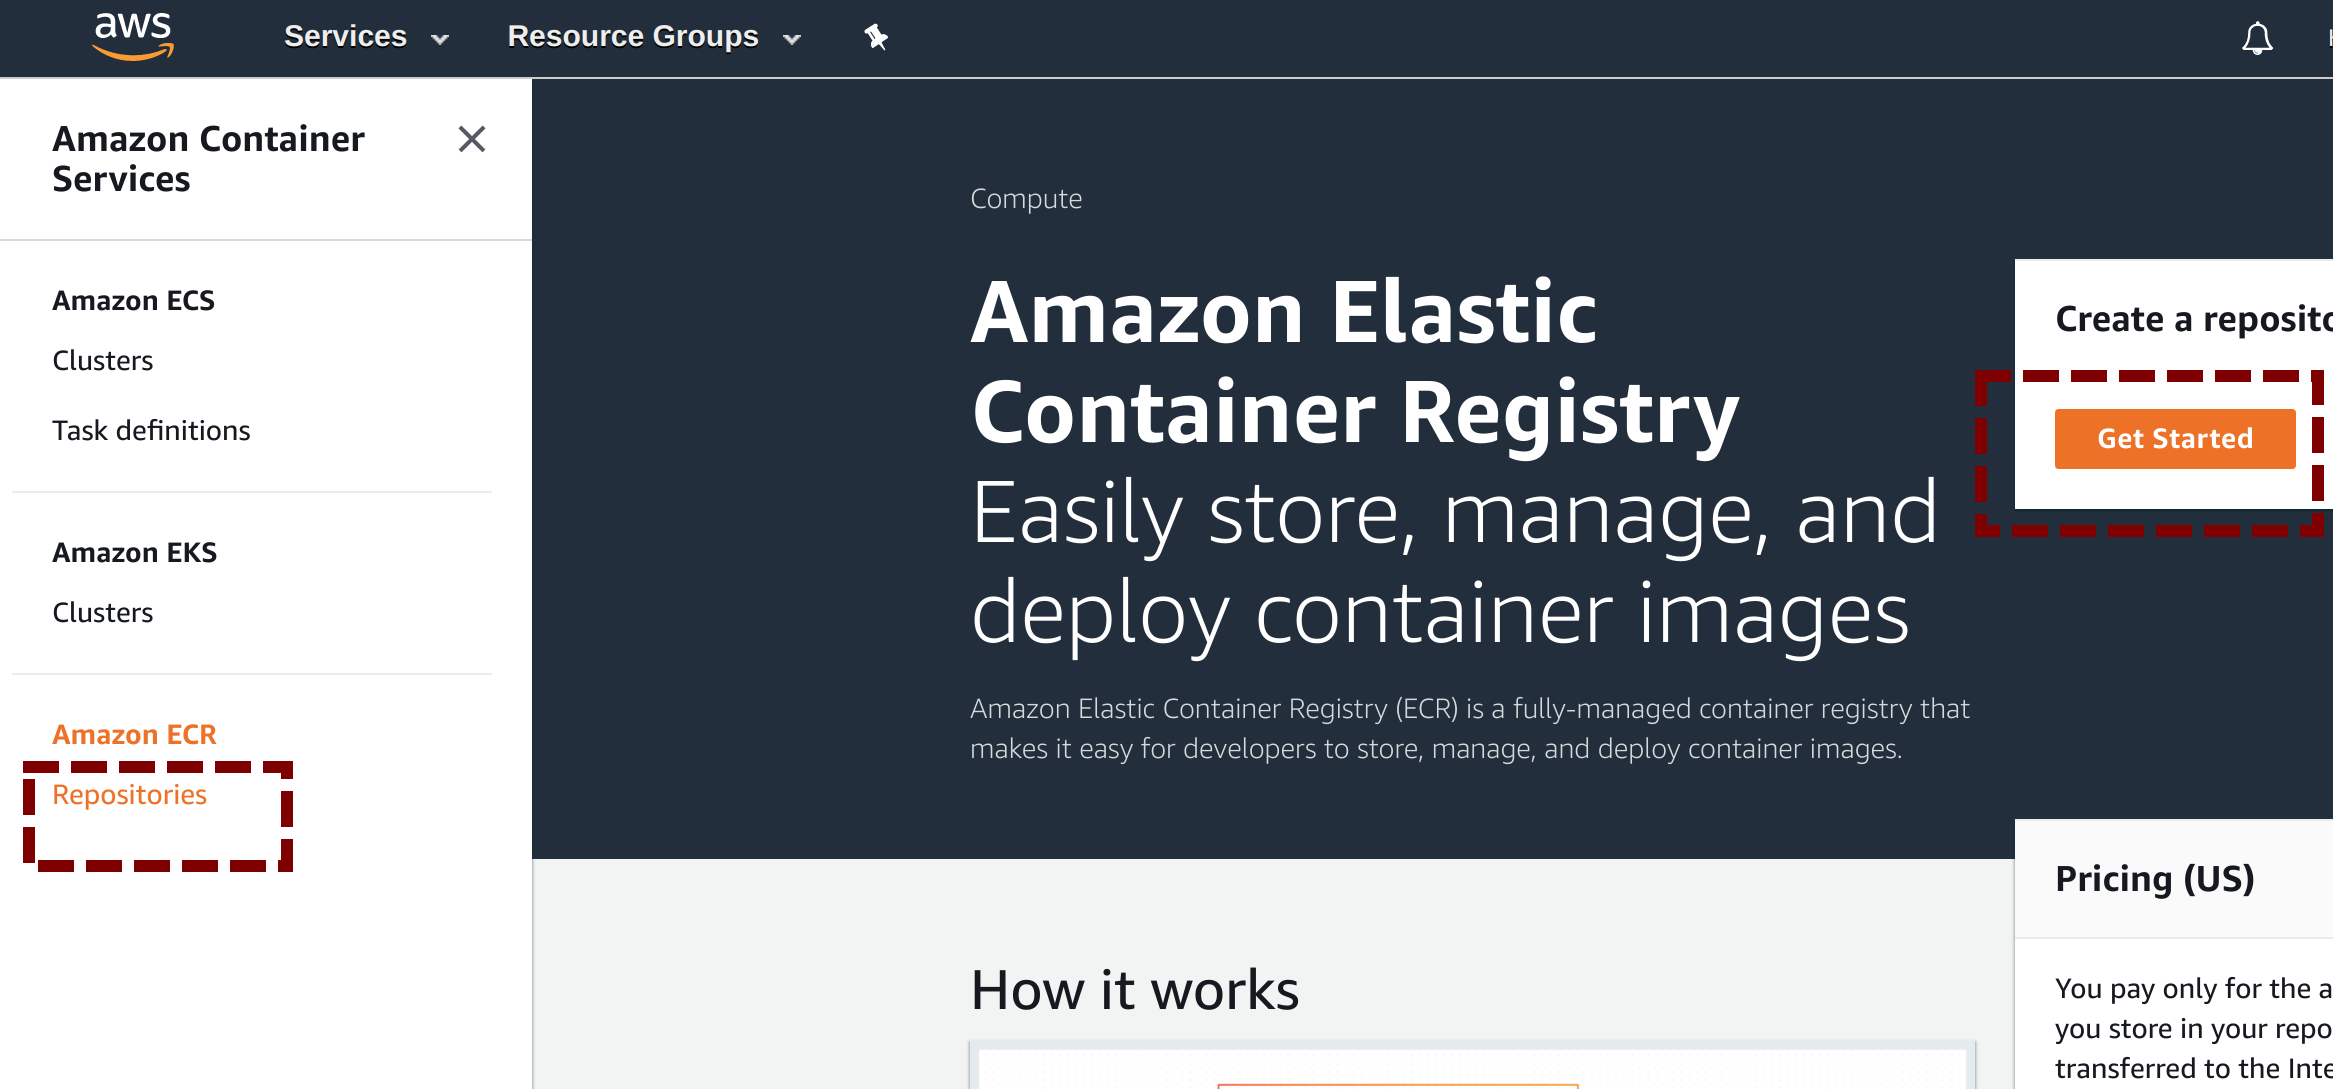
Once you land on the Amazon Elastic Container Registory home screen, click on Repositories on the left hand side panel. Or click on Get Started on the right hand side screen.
2. Create ECR Repository
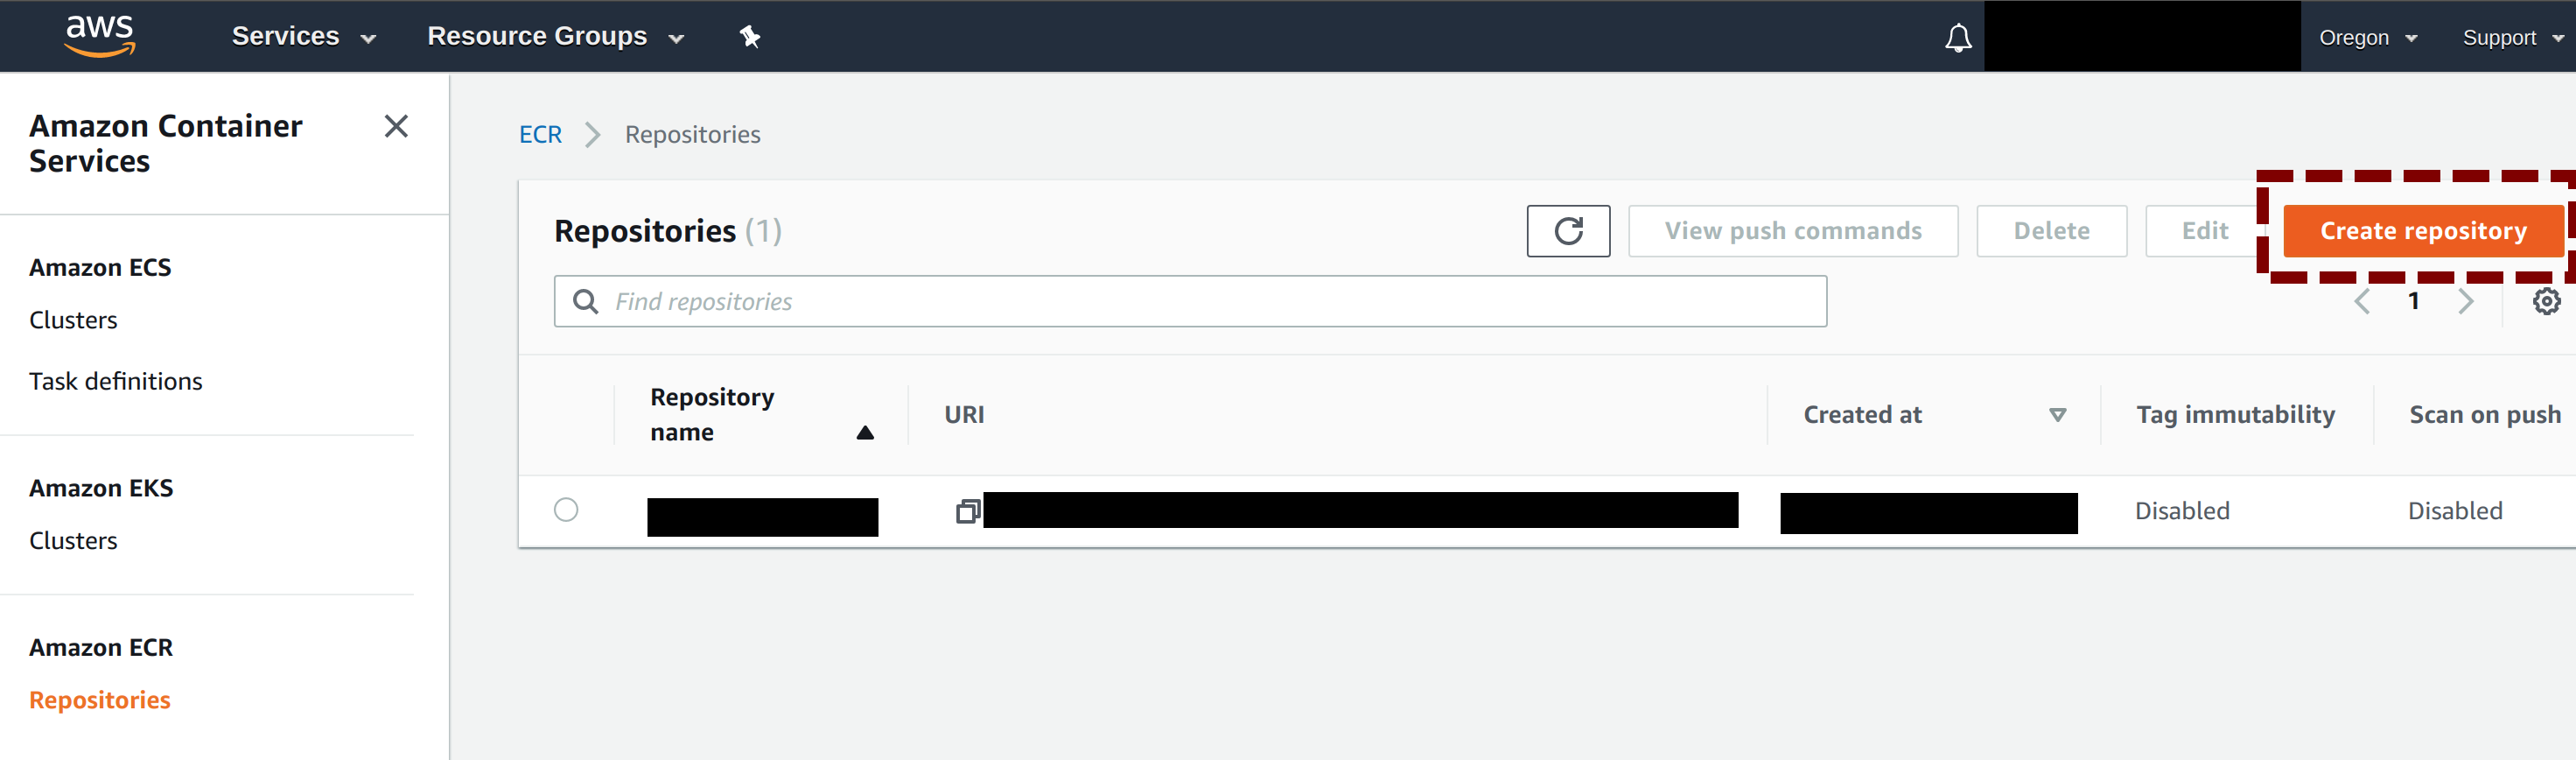
Then, on the ECR > Repositories dashboard, click on Create repository.
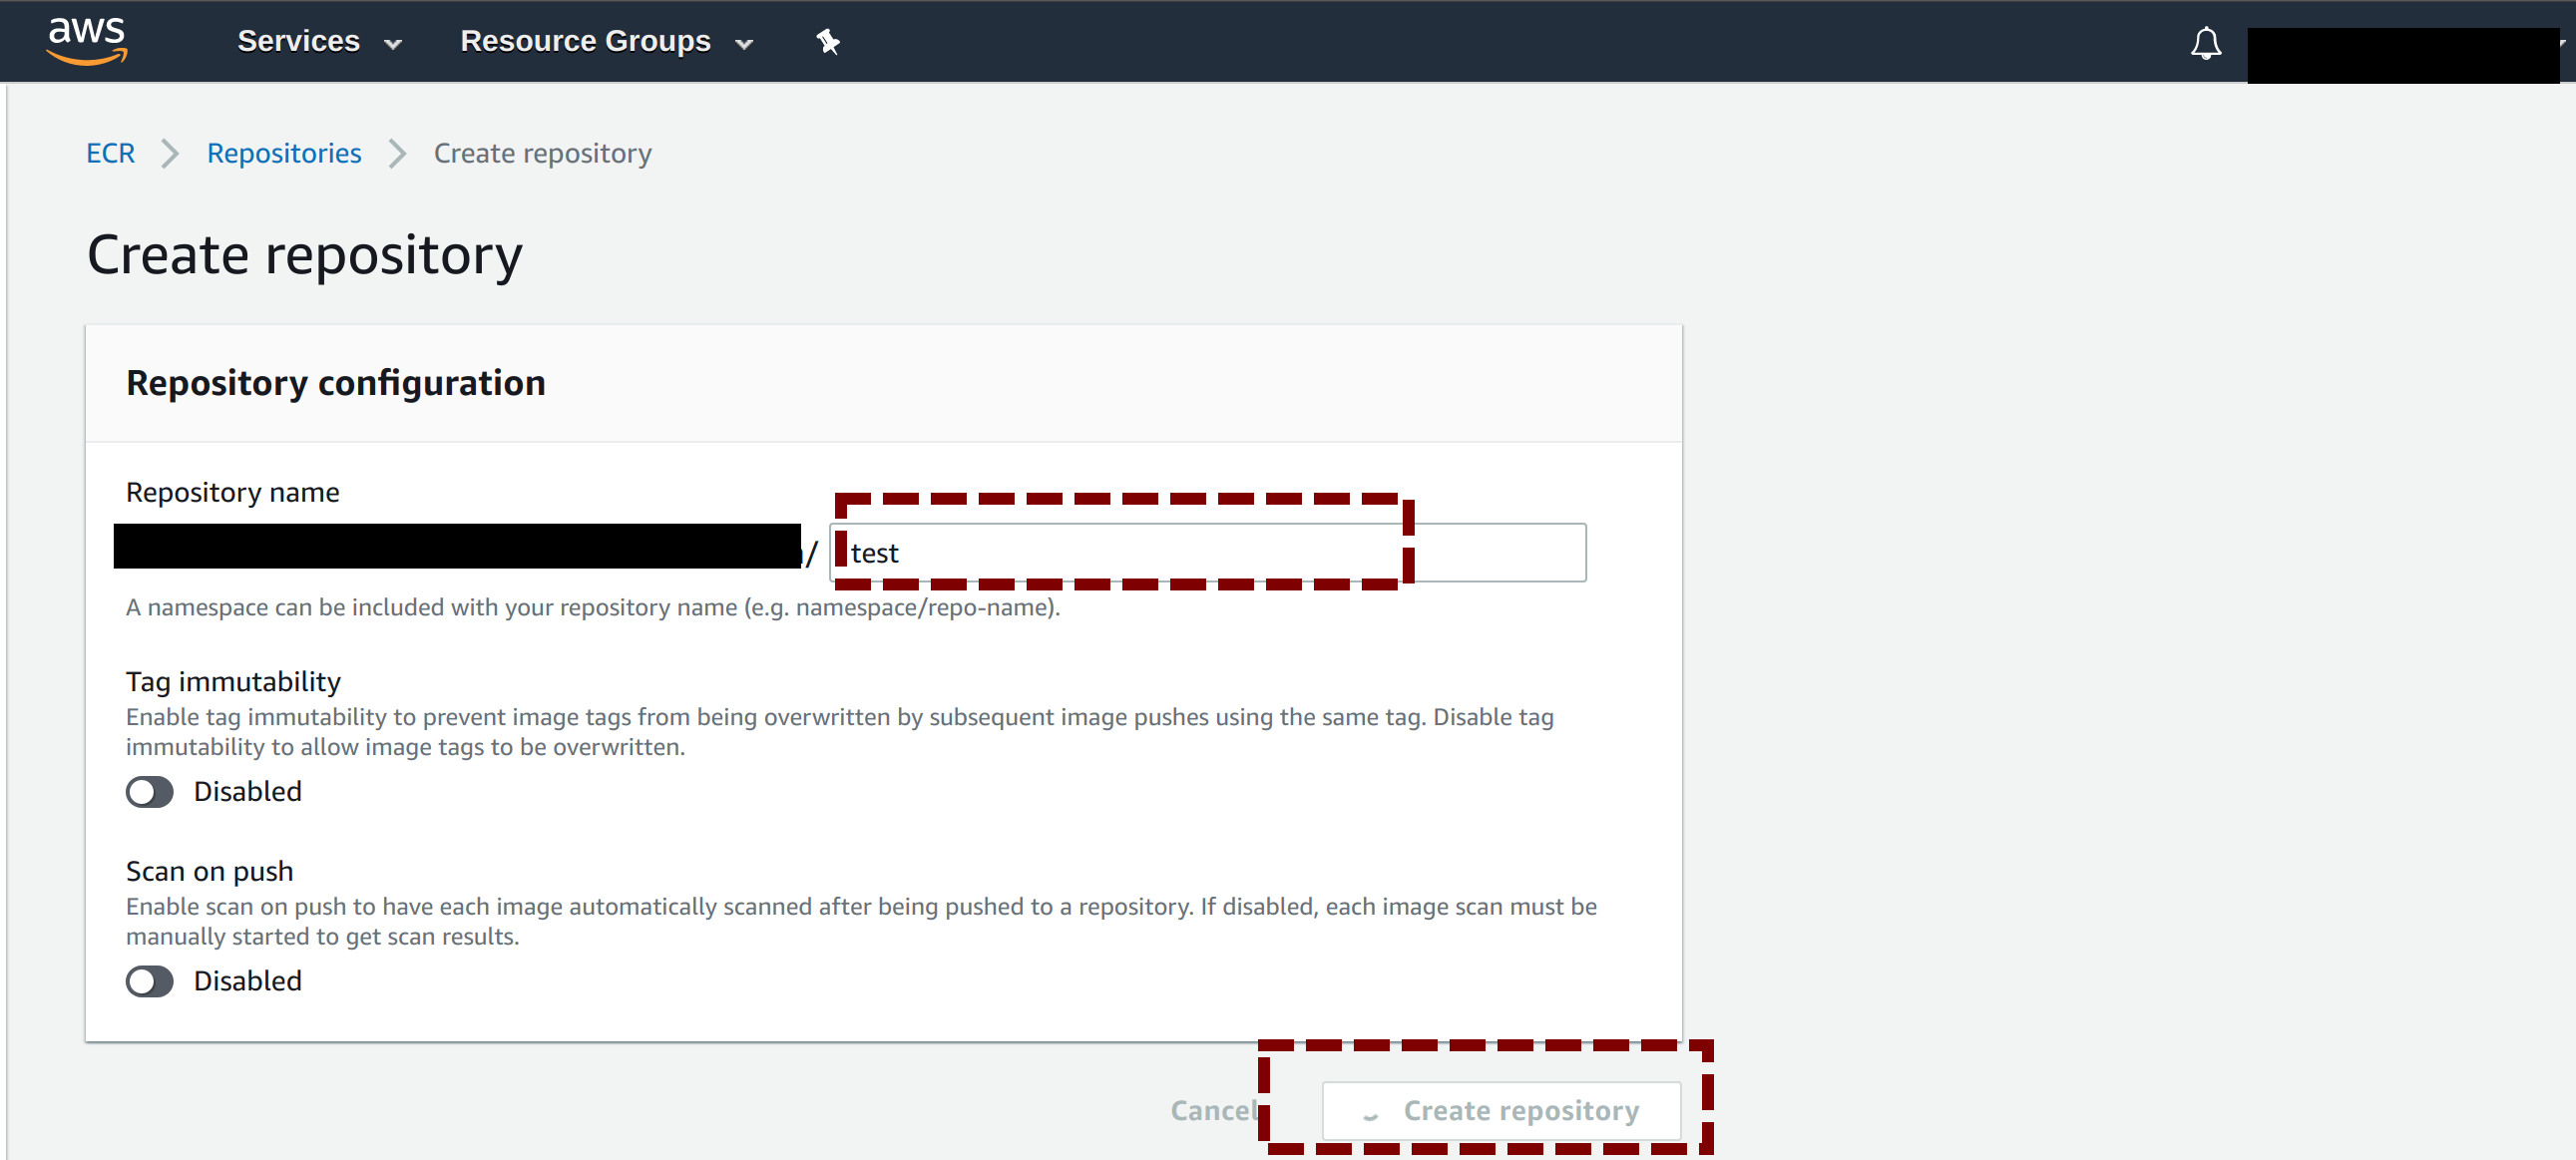
Now, the hardest part of the process: name the repository. Here, we use the name test.
3. Upload Docker Image to ECR
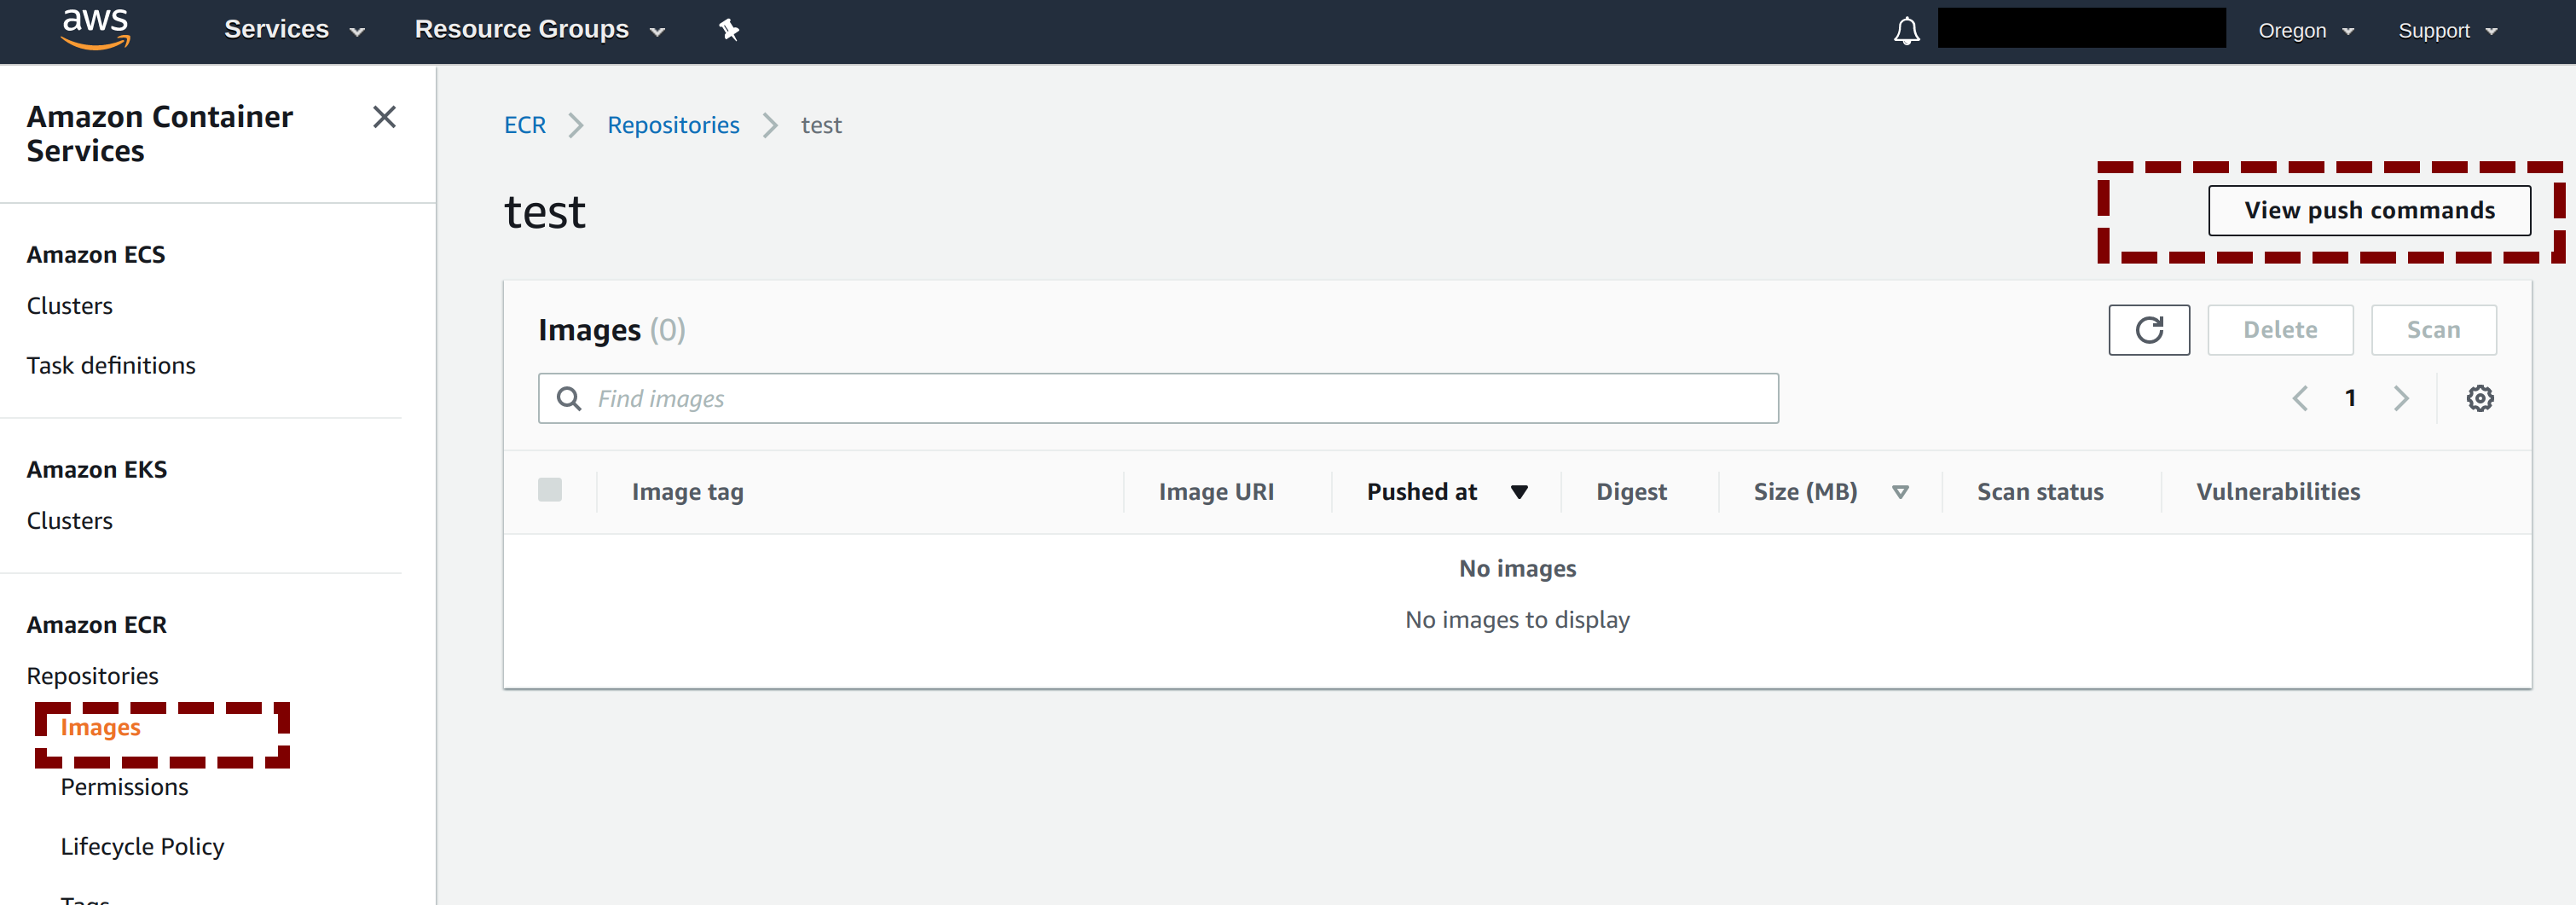
Once the repository has been created, you will be send back to the dashboard. Now, there should be a test repository listed. Click on the repository name on the dashboard and you will see the list of Docker images in that repository. It should be empty for now. We fix that by clicking on the View push commands button on the top right hand corner. That will bring us to upload a Docker image step.
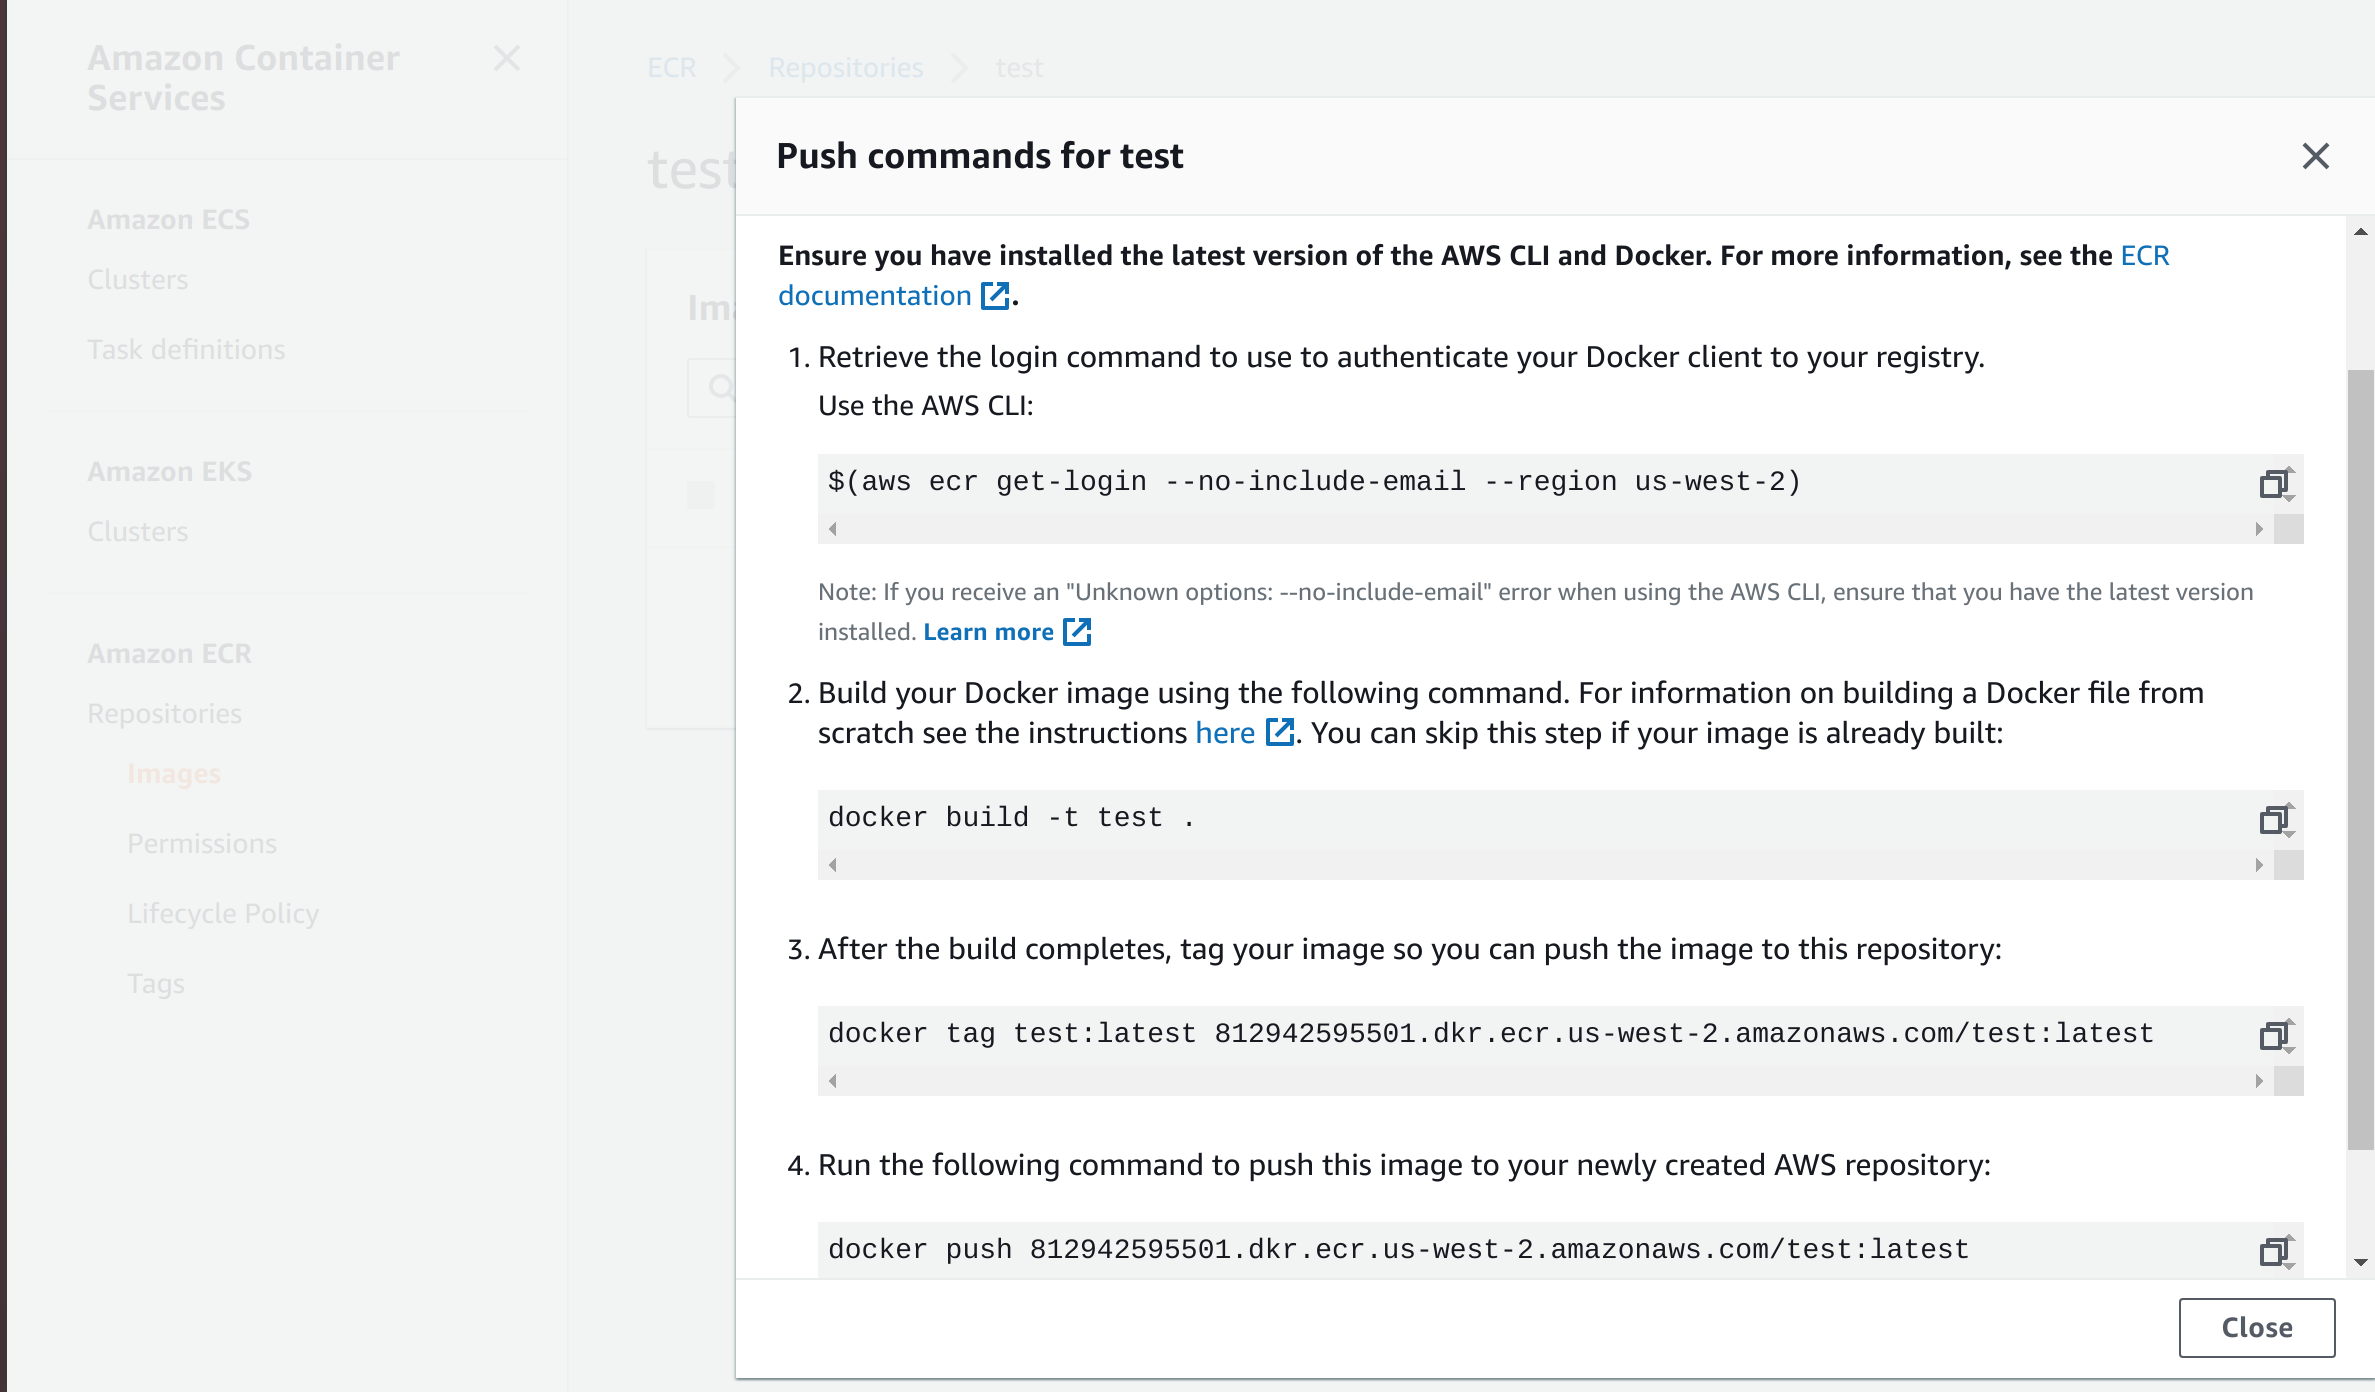
A list of instructions will attempt to walk you through the required commands to push a local Docker image to AWS ECR for both Linux/MacOS and Windows. AWS CLI is required for this step. Here’s a few pointers if you run into trouble following AWS’s provided directions.
- Make sure your local
AWS CLIhas the right credentials/configs. Admin role is nice. And please do not use root role for security purposes. - Skip this step if the Docker image has already been built locally.
- Make sure the
image name:latest matches your local image name in both places of the command. - See above.
One Last Thing. Teardown.
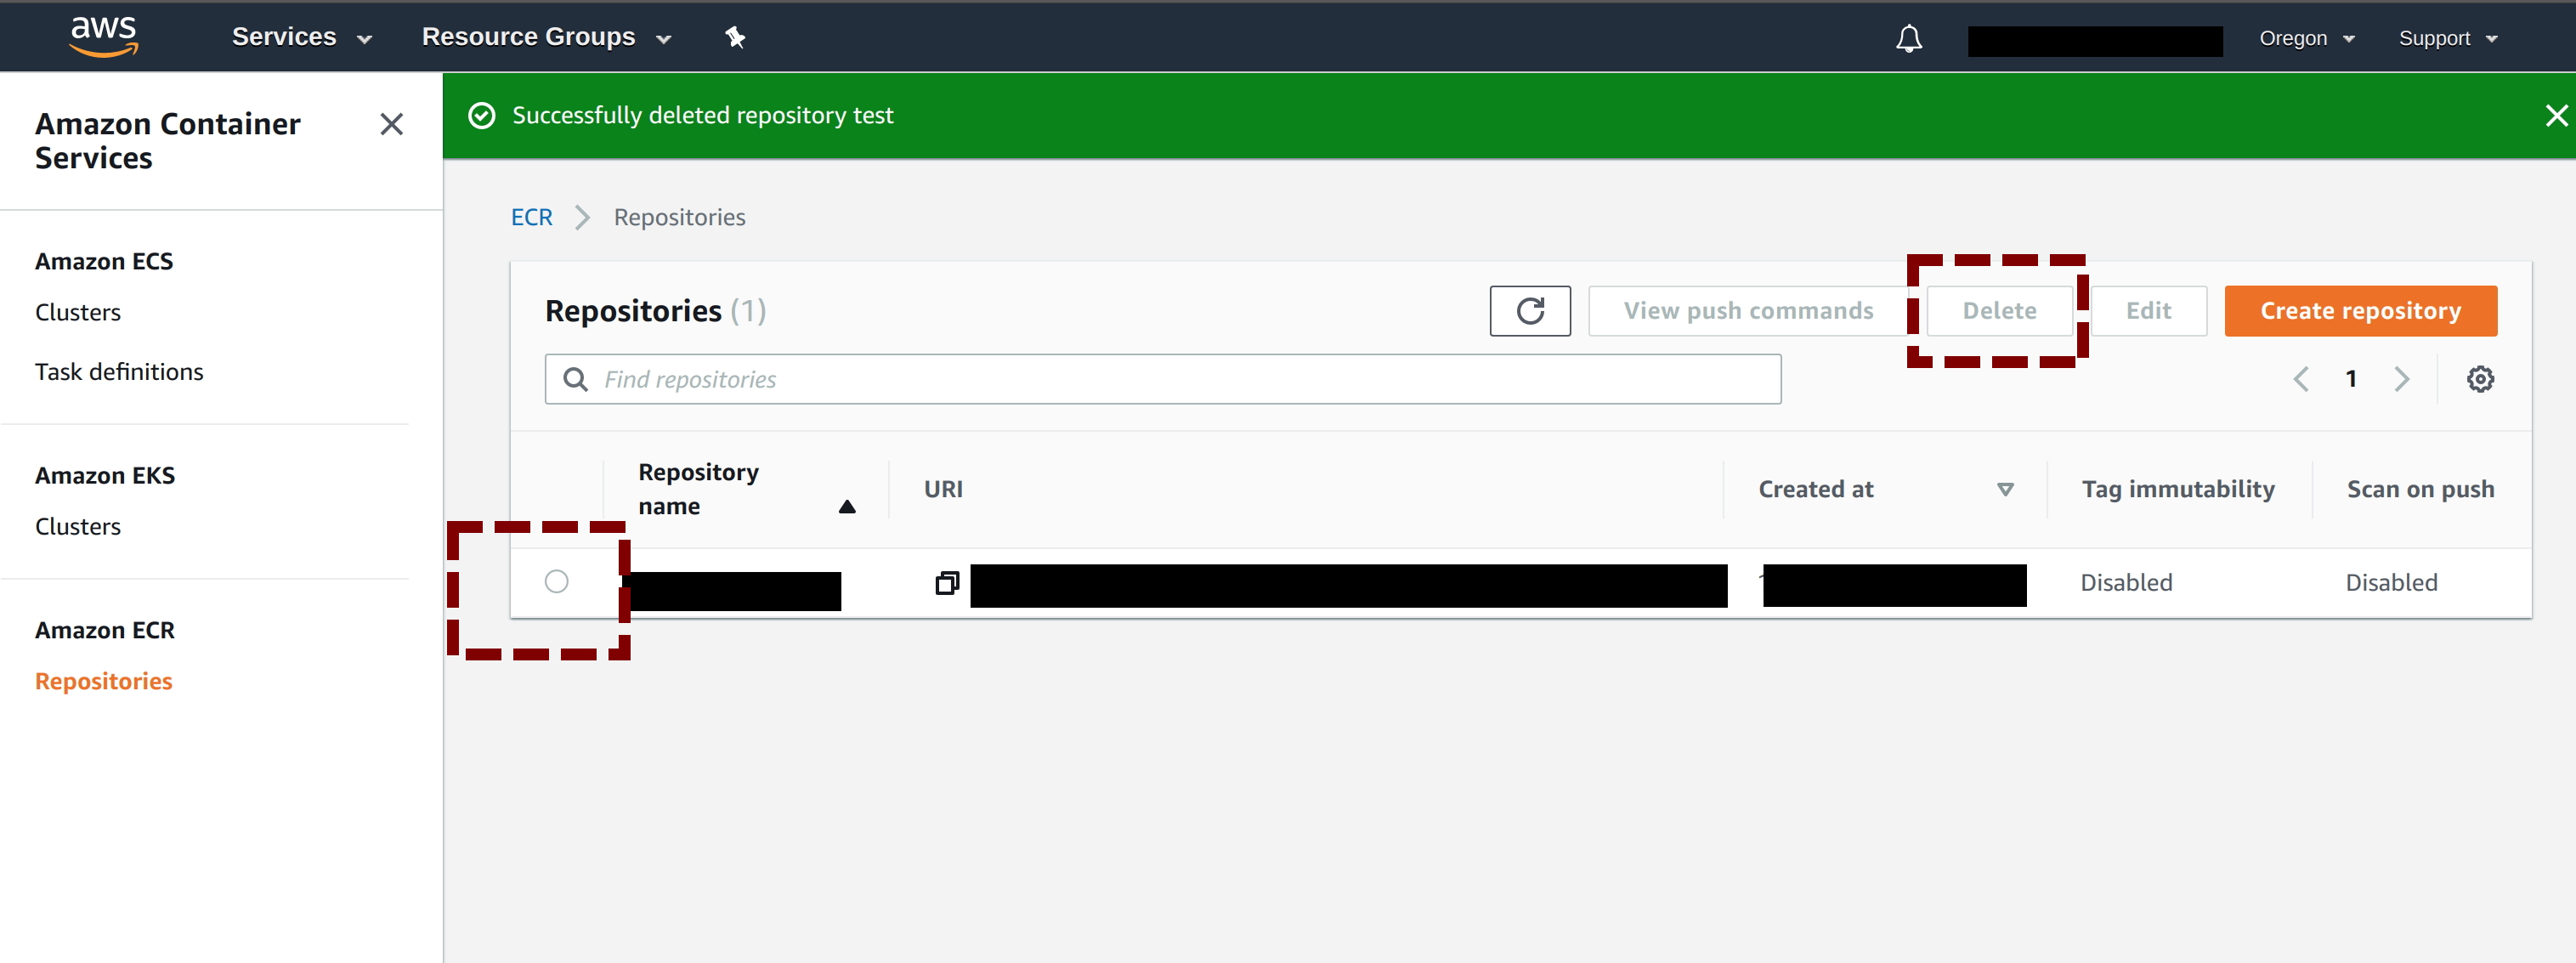
To tear down the uploaded image, check the circle in front of the repositories to be deleted and click on Delete. It will take a while and the repo and images inside that repo will be deleted.
What’s Next?
With our Docker image uploaded to ECR, we can deploy the Docker image to one of the compute services (EC2, ECS, EKG) on Amazon Web Services. Unfortunately there’s no direct or easy way to deploy Docker images to AWS Elastic Beanstalk.